Learn how to set up secure Git deployment from GitHub to Plesk using SSH Deploy Keys. This method supports both public and private repositories, fully automated deployments, and advanced post-deploy actions. Perfect for modern web apps, CI-style workflows, and professional hosting.
Why SSH Deploy Keys?
- Secure access to GitHub without passwords or tokens
- Best practice for private repositories
- Granular, read-only permission control
- Automated builds and deployments in Plesk
Step-by-Step: Private GitHub Repo Deployment on Plesk
1) Enable Git for your domain
- Open Plesk → Websites & Domains → Git.
- Enable Git if not active yet.
- Select Remote Git hosting.
- Enter the SSH repository URL:
git@github.com:YOUR-ORG/YOUR-REPO.gitExample:git@github.com:tenbyte/somesource.git
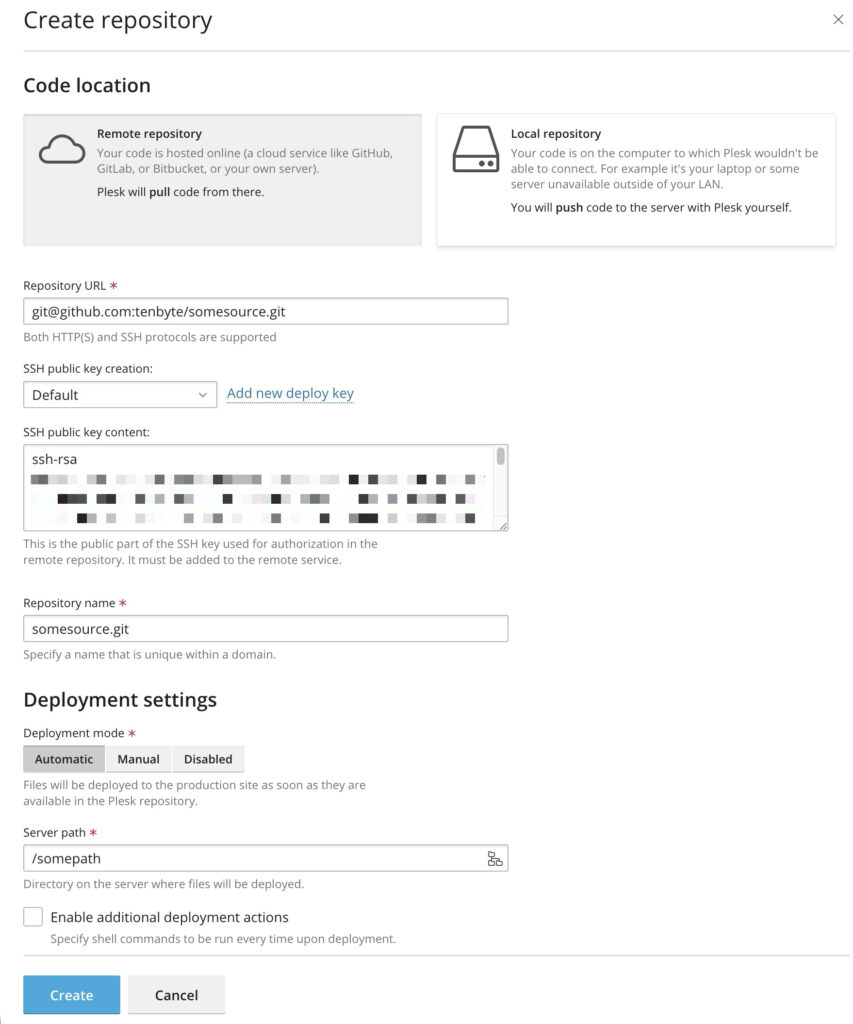
2) Copy the SSH Deploy Key from Plesk
- After saving the repo URL, Plesk displays a unique public key.
- Click View / Copy public SSH key.
- Copy the entire key string (
ssh-ed25519orssh-rsa).
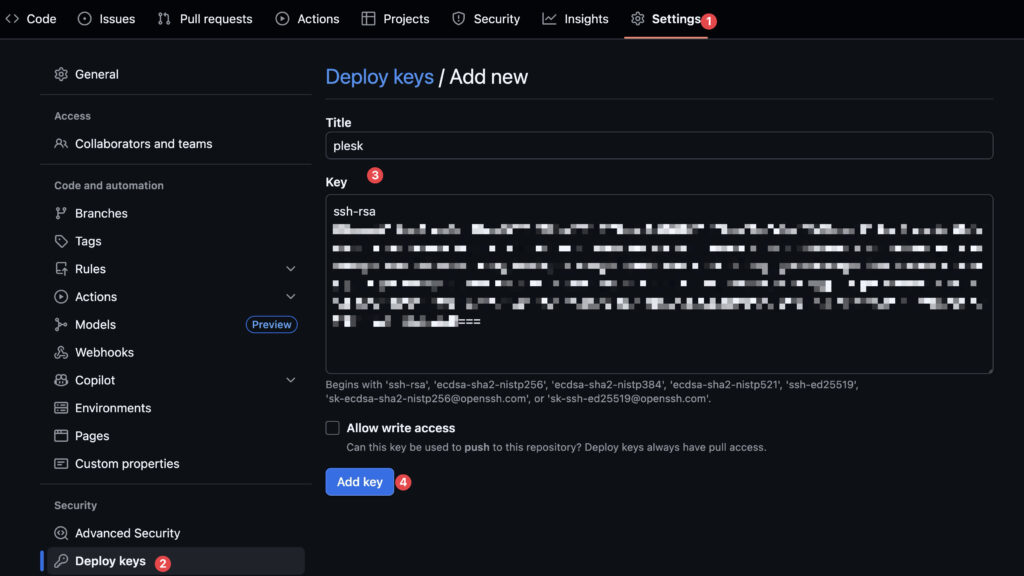
3) Add the Deploy Key to GitHub
- Navigate to your repository on GitHub.
- Go to Settings → Security → Deploy keys.
- Click Add deploy key.
- Name the key, for example Plesk.
- Paste the SSH key from Plesk.
- Keep Allow write access disabled for security.
- Save the key.
4) Configure Deployment Settings in Plesk
Return to Plesk and define how deployments should function:
- Deployment mode: Choose the correct document root directory.
- Auto-deploy: Enable if every push from
mainshould trigger deployment automatically. - Additional deployment actions: Specify shell commands to run after each Git pull. Useful for:
- npm install / yarn install
- npm run build
- Cache flushes
- File permissions updates
npm install npm run build chmod -R 755 httpdocs
5) Test deployment
Trigger a deployment manually with Pull updates and confirm the latest commit appears in Plesk.
⚠️ Please note: We do our best to keep things accurate, but we can’t guarantee perfection. Use at your own risk. – Please report errors or bugs to our Github